Categories
Resources

Ankle Sprains

Download and print the injury report form here.

Overview
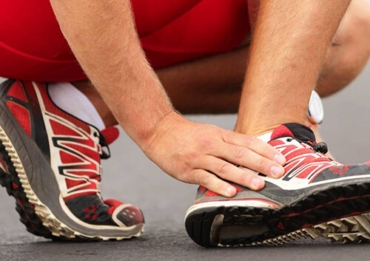
Lateral ankle sprains are one of the most common injuries occurring in sports.
Soccer players are at an increased risk due to the nature of the sport incorporating running, kicking, quick changes of direction, and playing surface.

Grading a Sprain
There are 3 Grades of ankle sprain, which depends on the amount of damage sustained in the ligament of your ankle.

  1. Grade 1: mild damage to a ligament or ligaments without instability of the affected joint. No visible bruising or swelling.
  2. Grade 2: partial tear to the ligament, in which it is stretched to the point that it becomes loose. Visible Bruising and swelling.
  3. Grade 3: complete tear of a ligament, causing instability in the affected joint. Substantial bruising and swelling is visible.

Treatment Options
Conservative therapy/treatment and rehabilitation NEEDS to start right away, even with Grade 1 sprains. The goal is to prevent recurrence and to build the strength and balance around your ankle. Injured muscle, tendon and ligaments heal with stronger and more organized collagen fibril architecture when a gentle load is applied during the healing process. Chiropractors or physiotherapists are great health care providers that will guide you in the right direction in regards to your treatment plan.
Rehabilitation of your ankle should be done in a step wise manner. The program should start with non-weight bearing exercises, moving to resisted exercises, and then weight bearing activities. Of course no two injuries are the same and your health care provider will be gearing the rehab based on their assessment. The basic components of a rehab program are as follows; PRICE, range of motion (ROM), Strengthening, Proprioceptive exercises and functional exercises.

P.R.I.C.E.

Initial treatment methods — or P.R.I.C.E. — include:

  1. Protect the area
  2. Rest the tissue
  3. Ice
  4. Compression (tape/brace/tensor)
  5. Elevation

Restoring Range of Motion
Functional ankle rehabilitation starts by normalizing joint ROM. This involves gentle movements of your ankle, taking care to avoid causing further tissue stretch injury. This aspect of healing can be performed by you with at home exercises and further enhanced in clinic by your chiropractor or physiotherapist. For example, performing gentle ankle pumps or drawing out the Alphabet with your foot to encourage movement. As symptoms allow, you can begin to progress to weight-bearing exercises.

  1. Ankle Pump: Point toe, then pull back toward you as hard as possible.

  1. Alphabet: You can do this exercise sitting or lying down. Pretend you are writing each of the letters of the alphabet with your foot.

Strengthening
Resistance exercises can begin when there is no pain through the available range of motion, with full weight bearing. Rehabilitation programmes usually start with low-level strengthening such as holding a sustained contraction. From there you can progress to exercises using a Theraband. See below for some examples of exercises. Once you are have reached pain free motion doing these exercises you can progress to body weight exercises.
Theraband:

  1. Dorsiflexion – Sitting with your leg out straight and your foot near a door, wrap the tubing around the ball of your foot. Anchor the other end of the tubing to the door by tying a knot in the tubing, slipping it between the door and the frame, and closing the door. Pull your toes toward your face. Return slowly to the starting position. Repeat 10 times. Do 3 sets of 10.
  2. Plantarflexion – Sitting with your leg outstretched, loop the middle section of the tubing around the ball of your foot. Hold the ends of the tubing in both hands. Gently press the ball of your own foot down and point your toes, stretching the Thera-Band. Return to the starting position. Repeat 10 times. Do 3 sets of 10.
  3. Inversion – Sit with your legs out straight and cross your uninjured leg over your injured ankle. Wrap the tubing around the ball of your injured foot and then loop it around your uninjured foot so that the Thera-Band is anchored at one end. Hold the other end of the Thera-Band in your hand. Turn you injured foot inward and upward. This will stretch the tubing. Return to the starting position. Repeat 10 times. Do 3 set of 10.
  4. Eversion – Sitting with both legs outstretched and the tubing looped around both feet, slowly turn your injured foot upward and outward. Hold this position for 5 seconds. Repeat 10 times. Do 3 sets of 10.

Proprioceptive / Balance Exercises
Retraining your proprioceptive/balance system is an integral part of sprain rehabilitation and is often forgotten. Sustaining an ankle sprain leads to significant deficits in balance. Ankle disc training (wobble board) has been found to significantly improve balance testing and decrease symptoms of functional instability. Proprioceptive training has also been shown to reduce the rate of re-injury in ankle sprains. Some examples of exercises are listed below

  1. Toe Raises: Stand in a normal weight-bearing position. Rock back on your heels so that your toes come off the ground. Hold this position for 5 seconds. Repeat 10 times. Do 3 sets of 10.
  2. Single leg balance: Stand without any support and attempt to balance on your injured leg. Begin with your eyes open and then try to perform the exercise with your eyes closed. Then try it with your knee bent. Hold the single-leg position for 30 seconds. Repeat 3 times.

Functional/Sport Specific Exercises
The final phase of acute ankle sprain rehabilitation consists of functional exercises and sport-specific drills. These may begin when there is full ankle range of motion, no pain, and about 80% strength compared to the other ankle. These exercises help the athlete re-learn sport specific motor patterns. The patient should start at a low level of intensity and progress with increased intensity and difficulty provided they remain pain free while performing the exercise, and have no pain or swelling following the training session. In terms of soccer you can do drills that involve weaving in and out around pylons, skipping, kicking drills, and running with changing directions.
Conclusion
Treatment and rehabilitation of ankle sprains is important to speed up recovery and help avoid recurrence. Your chiropractor or physiotherapist have many options to assist with your healing and get you back to your sport healthy and strong.
References

  1. Hertel J. Functional Anatomy, Pathomechanics, and Pathophysiology of Lateral Ankle Instability. Journal of Athletic Training (2002); 37(4):364-375.
  2. Kohne et al. A Prospective, Single-Blind, Randomized, Controlled Clinical Trial of the Effects of Manipulation on Proprioception and Ankle Dorsiflexion in Chronic Recurrent Ankle Sprain. JACA (2007) VOLUME 7-17.
  3. Safran MR et al. Lateral ankle sprains A comprehensive review: etiology, pathoanatomy, histopathogenesis, and diagnosis. Med Sci Sports Exerc (1999); 31:S429-S437.
  4. van Rijn et al. What is the Clinical Course of Acute Ankle Sprains A Systematic Literature Review. The American Journal of Medicine (2008); 121:324-331
Categories
Resources

Medial Tibial Stress Syndrome

Download and print the injury report form here.

Overview
Medial Tibial Stress Syndrome (MTSS), commonly known as shin splints in the general public, is an exercise-induced nagging dull ache along the lower inner shin (approximately 2 centimetres in length). It is one of the most common complaints of the lower leg in the athletic population, and an incidence ranging between 4 and 35%. This condition most commonly affects runners and those athletes whose sports involve running such as soccer, basketball, long jump and tennis.

What Causes MTSS?
The cause of MTSS is controversial and there are many theories. Some researchers believe it is the micro-tearing of the deep calf muscle, called the soleus, away from the shin bone, causing inflammation. Others suggested that MTSS is a consequence of repetitive stress imposed by impact forces that eccentrically fatigue the soleus which creates repeated tibial bending or bowing, in turn overloading the bone-remodelling capabilities of the tibia. In simple terms this theory suggests that MTSS is related to mechanical overloading of the bone. Lastly, Messier and Pittalai showed that not only was increased pronation significant in participants with MTSS, but the maximum velocity of pronation (how quickly one slams their foot into prontation) had a greater correlation in those with MTSS than did pronation alone.
What Are the Risk Factors of MTSS?
The proposed risk factors of MTSS are:

  1. Increased foot pronation
  2. Increased muscular strength of the plantar flexors
  3. Increased varus tendency of the forefoot or hindfoot (or both)
  4. An abrupt increase in training intensity
  5. Inadequate calcium intake
  6. Hard or inclined running surfaces (or both)
  7. Inappropriate or old inadequate footwear
  8. Previous injury
  9. Female
  10. Increased BMI
  11. Increased calf girth
  12. Greater internal and external hip range of motion
  13. Inversion / eversion strength imbalance
  14. Static navicular drop and dynamic velocity

How Can I Treat MTSS?
Treating MTSS can be challenging due to the fact that we still do not know exactly what causes it. However, understanding the sport and assessing for potential risk factors can help guide treatment. There are various treatment options that can be prescribed by your chiropractor or physiotherapist. Listed below are treatment options that can be performed by your health care provider after an assessment to ensure your treatment is specific to your injury.

  1. Ice
  2. NSAIDS (anti-inflammatory medication)
  3. Stretching (limited evidence)
  4. Active Release Technique (ART)
  5. GRASTON technique
  6. Sport compression socks (may provide direct compression on the tibia/shin through the surrounding soft tissues, especially during intermittent loading)
  7. Electro-Acupuncture
  8. Shockwave therapy
  9. Strengthen exercises for the legs
  10. Graded running program

MTSS is a tricky condition that may linger for weeks or months. Do not ignore the symptoms because the earlier you receive treatment the quicker you will heal.
References

  1. Moen MH, Holtslag L, Bakker E et al. The treatment of medial tibial stress syndrome in athletes; a randomized clinical trial. Sports Medicine, Arthroscopy, Rehabilitation, Therapy & Technology. 2012, 4:12.
  2. Moen MH, Rayer S, Schipper M et al. Shockwave treatment for medial tibial stress syndrome in athletes; a prospective controlled study. British Journal of Sports Medicine 2012;46:253–257
  3. Myofacial Needling for Treatment of MTSS. Functional Anatomy Blog by Dr. Spina
  4. Craig DI. Medial Tibial Stress Syndrome: Evidence-Based Prevention. Journal of Athletic Training 2008;43(3):316-318
  5. Tweed JL, Avil SJ, Campbell JA et al. Etiological Factors in the development of Medial Tibial Stress Syndrome. Journal of the American Podiatric Medical Association. 2008; 98 (2), 107-111.
  6. Moen MH, Tol JL, Weir A et al. Medial Tibial Stress Syndrome A Critical Review.. Sports Medicine. 2009. 39 (7).
Categories
Resources

Knee Injuries

Download and print the injury report form here.

Overview
One of the most common and serious knee injuries in sport is an anterior cruciate ligament (ACL) sprain or tear. A typical ACL injury will take a player away from sports for 6 to 12 months and can result in long-term consequences for their health and athletic career. They are often left with functional deficits, knee instability and early-onset osteoarthritis. Once an athlete injures their ACL they have a 25% risk of sustaining a second ACL injury. However, many of these long-term consequences can be avoided with successful rehabilitation and a safe return to sport.
Statistics

  1. There are roughly 250,000 ACL tears per year
  2. More than 75% of ACL injuries are non-contact
  3. The rate of ACL tears is 2 to 8 times higher for females than males

Anatomy of the Knee

click to view larger version

  1. The knee joint comprises 3 bones: the femur, the tibia and the patella.
  2. There are 2 menisci which are disc-like structures that sit between the femur and the tibia and act as shock absorbers, decrease friction and aid in joint stability
  3. There are 4 primary ligaments in the knee that hold the bones together and stabilize the joint:
    1. — Medial and lateral collateral ligaments: these run along the side of the knee and control sideways motion of the knee
    2. — Anterior & posterior cruciate ligaments: these form an X deep in the knee and work to prevent forward and backward translation of the knee joint

Mechanism of Injury

  1. Contact: 20% direct collision
  2. Non-Contact: 80%
    1. — Changing direction rapidly
    2. — Landing from a jump incorrectly
    3. — Plant and cut
    4. — Sudden deceleration with knee extended

What Puts You at Risk?

  1. Being female:
    1. — Increased angle from pelvis to knee puts more stress on the ACL
    2. — Differences in neuromuscular control, strength and mechanics
  2. Inadequate muscle strength, co-ordination or balance, especially an imbalance between quadriceps and hamstring strength and gluteal muscle weakness
  3. Improper training for sport-specific movements, including poor landing and cutting technique

Treatment & Rehabilitation
Treatment for an ACL injury varies depending on the degree of damage done to the ACL and the surrounding structures. ACL injuries often require surgical reconstruction, especially if there is a complete tear of the ligament. Non-surgical management may be sufficient in elderly or less active individuals if the stability of the knee joint is intact. Whether your treatment involves surgery or not, rehabilitation is highly important for regaining function of the lower extremity.
When Can I Go Back to Aport?
With the risk of ACL re-injury being as high as 25%, it is crucial that the athlete is fully prepared both physically and mentally before returning to play. This is achieved through a rigorous course of rehabilitation, lasting for 6 to 12 months after injury. It is very important when designing a rehabilitation program that you have an understanding of the physical demands of the sport. For example, soccer players repeatedly produce forceful actions (running, cutting, jumping, sprinting) with short recovery periods. This requires power, co-ordination, balance and proprioception. If the rehabilitation program touches on each of the key elements and skills required for the sport, the athlete will be able to return to sport with a much lower risk of re-injury. The following section will outline the key concepts and exercises that should be included in a rehabilitation program to ensure a safe return to play. The focus will be on return to play for a soccer athlete, however the exercises and skills can easily be modified and applied to different sports.
PHASE 1 GOALS: Early Stage Rehabilitation (weeks 0 to 6 — timelines are approximate)

  1. Pain and swelling control
  2. Early weight-bearing and gait training
  3. Range of motion exercises
  4. Quadriceps muscle activation – quad sets, straight leg raises, muscle stimulation
  5. Maintain non-involved limb strength
  6. Trunk and hip basic core stability exercises

PHASE 2 GOALS: Progressive Strengthening and Neuromuscular Retraining (weeks 4 to 12)

  1. Regain quadriceps and hamstring strength to 85% of the uninjured leg
  2. Achieving proper lower extremity alignment during activities
  3. Pelvis and trunk stabilization
  4. Neuromuscular retraining (balance, proprioception and functional exercises)

During Phase 2, weight-bearing, closed-chain exercises are introduced to rebuild lower extremity strength. Particular attention must be paid to proper lower extremity alignment to prevent rotation and valgus at the knee joint. The exercises in this phase should begin on a stable surface and gradually progress to unstable surfaces to challenge the neuromuscular control of the knee. Incorporating the soccer ball (or any sport-specific equipment) into exercises in this phase will help the athlete prepare for the more advanced, sport-specific exercises during the later phases of rehab.
Exercises to include in Phase 2
Strength:

  1. Squat and lunge progressions
  2. Stationary cycling with progressive resistance and speed increases
  3. Leg press, calf raises, bridging
  4. Forward bend with single leg stance (single leg deadlift)
  5. Running in a straight line at 12 weeks if athlete is able to control alignment during a single leg squat

Trunk and Pelvis Stability:

  1. Plank variations
  2. Clamshells and side leg raise

Neuromuscular Control:

  1. Single leg stance ball toss & single leg stance figure 8 with soccer ball
  2. Single leg mini squat
  3. Single leg balance with partner pushes

Flexibility:

  1. Quadriceps, hamstrings and calf stretching
  2. Foam roll ITB & glutes

PHASE 3 GOALS: Sport Specific Training, Plyometrics and Agility (months 4 to 12)

  1. Return the player to sport at a reduced level, slowly bringing the player up to unrestricted practice
  2. Progress complexity of strengthening and neuromuscular control exercises
  3. Sport-Specific running and agility drills introduced
  4. Proper knee alignment and landing technique during hopping activities

During Phase 3, the drills become more complex and the player is gradually introduced back into a team setting at a reduced level. It is important that the athlete is progressed gradually during this stage as a lot of rehabilitation programs fail when there is a rapid increase in exercise load.
Exercises to Include in Phase 3
Strength:

  1. Continue with strengthening exercises from Phase 2

Running Drills:

  1. Forward and backward jog
  2. Side shuffle & cariocas

Plyometrics:

  1. Forward / backward hop – 2 legs
  2. Lateral hop – 2 legs
  3. Single leg hops forward
  4. Bounding

Sport Specific Agility:

  1. 4 Corner run
  2. Zigzag run
  3. Drills combining quick-feet, short sprints, cutting and accelerating, and body rotations

PHASE 4: Return to Sport (months 6  to 12)
The following criteria must be met in order for the athlete to return to sport:

  1. Successful completion of the “Hop Tests”
  2. Ability to demonstrate proper knee alignment and technique during all sport related activities
  3. Quadriceps and hamstring strength at 85-95% of the uninjured leg
  4. Psychological readiness

How Do I Prevent ACL Injury?
Many of the drills and exercises that are incorporated in the ACL rehabilitation program can be used on a regular basis for ACL injury prevention. Many studies have shown the positive effects of a neuromuscular training program in preventing knee injury. Prevention programs that address neuromuscular control of the lower extremity through strengthening, plyometrics and sports-specific agility exercises can reduce injury rates by as much as 30 to 50%. The FIFA 11+ is an excellent prevention program and, when incorporated regularly into training, can drastically reduce the incidence of ACL injury.

Categories
Resources

Head Injuries

Download and print the injury report form here.

What should you do if you think a player has had a concussion?
Seek medical advice if a person has symptoms and/or signs of a concussion after a blow to the head or body. Without proper management, a concussion can result in permanent problems and seriously affect one’s quality of life.
If you think you have had a concussion, tell a doctor, family member, friend, teammate, or coach.
For the Athlete — both parent and athlete to read this
For a second or third concussion or a severe concussion with lasting symptoms:
Have your physician refer you to
Karen M. Johnston, MD, Ph.D, FRCSC, FACS
Neurosurgeon
Division of Neurosurgery
University of Toronto
Concussion Management Program AESM
Phone: 416-800-0800
Here are some other resources tailored to different requirements
Things to Know About Concussions
Return to Play Guidelines
Concussion Guidelines for Teachers
Concussion Guidelines for Athletes
Concussion Guidelines for Parents
Concussion Guidelines for Coaches

Categories
Resources

Groin Strains

Download and print the injury report form here.

Overview
Groin (or adductor muscle) strains are another unfortunate and frustrating soccer injury, accounting for 10-18% of all soccer injuries. This is because of the significant number of forceful side-to-side push-offs, cutting and lateral movements involved in soccer. Adductor strains can also occur when a player is kicking the ball and is met with resistance from their opponent. An adductor muscle strain can occur to one of 5 muscles that make up the adductor group: adductor longus, adductor brevis, adductor magnus, gracilis and pectineus.
Signs and Symptoms

  1. A sudden sharp pain in the inner thigh or pelvis during exercise
  2. Pain on stretching the muscle; bringing your leg away from midline
  3. Pain with contraction / use of the muscle; bringing your leg towards midline
  4. Possible swelling and bruising depending on the severity
  5. Tenderness along the muscle belly or where the tendon attaches to the pelvis

Risk Factors

  1. Previous groin injury
  2. Imbalance of strength between your hip adductors and abductors; a player is 17 times more likely to sustain an adductor strain if their adductor strength is less than 80% of their abductor strength
  3. Inadequate warm-up

Initial Treatment

  1. Rest: avoid use of the injured leg. This is not a “no pain, no gain” situation – avoid painful activities or movements. Crutches main be necessary for the first few days if you are unable to weight-bear
  2. Ice: 15 to 20min, 4 to 5 times per day for the first 2 or 3 days
  3. Elevation: if there is swelling, elevate your leg when resting. You can also apply a tensor bandage for compression
  4. Medication: Advil, Tylenol or Naproxen can be taken to control pain and inflammation – speak with your doctor before taking any medication
  5. Hydration and nutrition: an anti-inflammatory diet can greatly speed recovery
    Consult with your doctor, physiotherapist, chiropractor, osteopath or athletic therapist to help you during the early stages

Return to Sport
As with a hamstring injury, groin strains need extra care and complete rehabilitation before you are able to return to play. The risk of re-injury is high and returning to sport before the body is ready can have a disastrous affect on the rest of your season.
General Criteria

  1. Full strength without pain
  2. Full range of motion without pain
  3. Ablility to perform sport-specific movements at near full speed without pain

Compression shorts or different taping techniques can also help to support the muscles in the early stages after returning to sport. You may find that you need to resume icing after practices or games if there is any soreness afterwards.
Include these exercises in your return to sport program

  1. Front and side planks
  2. Lateral lunges and lateral sliding lunges
  3. Body-weight squats
  4. Fascial sling stretching
  5. Dynamic mobility
  6. Agility training
  7. Balance and proprioception training

Prevention
General Guidelines

  1. Adequate warm-up that incorporates dynamic stretching, gradual progression to sport specific movements, progressive running drills, balance and agility training
  2. Maintaining good hamstring strength and flexibility
  3. Proper rehabilitation following initial injury

Include these exercises in injury prevention program to minimize your risk of adductor injury

  1. Dynamic stretching of hip flexors, gluteals, hamstrings, quadriceps and adductors
  2. Plank variations: front and side planks, rotating planks
  3. Pelvic bridge variations: double leg, single leg, unstable surfaces
  4. Lunge variations: windmill lunge, lateral lunge, sliding lunge

References

  1. Ekstrand, J., M. Hagglund, and M. Walden. “Epidemiology of muscle injuries in profressional football (soccer).” American Journal of Sports Medicine 20 (2011).
  2. Mtshali, P. TS, N. P. Mbambo-Kekana, A. V. Stewart, and E. Musenge. “Common lower extremity injuries in female high-school soccer players in Johnanesburg east district.” South African Journal of Sports Medicine 21 (2009).
  3. Brumitt, J. “Eccentric training to reduce hamstring injuries in sprinters.” NSCA’s Performance Training Journal 6: 8-10.
Categories
Resources

Hamstring Injuries

Download and print the injury report form here.

Overview:
Hamstring strains make up a substantial percentage (10-23%) of acute injuries in soccer and can result in a lot of missed time from sport. On average, players will miss 8-25 days of sport after injuring their hamstring, depending on the severity of their strain. What’s even more concerning is the vicious cycle of recurring hamstring injury. Almost 1/3 of hamstring injuries will recur, with the greatest risk during the initial 2 weeks following return to sport. This is often due to inadequate rehabilitation, returning to sport too soon, or both. However, you can greatly decrease your chance of re-injury (or prevent the injury in the first place) by following the guidelines below.
Definition:
Hamstring injuries involve straining or tearing the muscle or tendon in the back of your thigh. There are three hamstring muscles that comprise the hamstring group and injury can occur to one or all of the muscle bellies. Injuries to the hamstring usually occur during sprinting or explosive movements – often when they forcefully contract while on stretch or when they fall out of sync of their opposing muscle group, the quadriceps.
Signs and Symptoms:

  1. A sudden sharp pain in the back of the leg during exercise
  2. Pain on stretching the muscle
  3. Pain with contraction/use of the muscle
  4. There may be swelling and bruising depending on the severity
  5. Tenderness along the muscle

Risk Factors:

  1. Previous hamstring injury – There is more than twice as high a risk of sustaining a new hamstring injury if you’ve previously injured your hamstring.
  2. Sports that involve explosive jumping or sprinting
  3. Imbalance between hamstring and quadriceps strength
  4. Inadequate warm-up
  5. Fatigue – More muscle injuries occur in the second half of the match.

Initial Treatment:

  1. Rest: Avoid use of the injured leg. This is not a “no pain, no gain” situation – avoid painful activities/movements. Crutches main be necessary for the first few days if you are unable to weight-bear
  2. Ice: 15-20min, 4-5x/day for the first 2-3days
  3. If there is swelling, elevate your leg when resting. You can also apply a tensor bandage for compression.
  4. Advil, Tylenol or Naproxen can be taken to control pain and inflammation – speak with your doctor before adding any medication.
  5. Ensure proper hydration and nutrition – an anti-inflammatory diet can greatly speed recovery
  6. Consult with your doctor, physiotherapist, chiropractor, osteopath or athletic therapist to help you during the early stages.

Return to Sport:
Because there is such a high recurrence rate for hamstring strains it is very important that you complete your rehabilitation fully before returning to sport.
General Criteria before Returning to Play:

  1. Full strength without pain
  2. Full range of motion without pain
  3. Able to perform sport-specific movements at near full speed without pain

Compression shorts or different taping techniques can also help to support the muscles in the early stages after returning to sport. You may find that you need to resume icing after practices or games if there is any soreness afterwards.
Eccentric strength training and neuromuscular control exercises have been shown to greatly reduce the risk of re-injury and should be incorporated into your rehabilitation.  However, these exercises should only be introduced once you have completed the initial treatment and begun some early muscle activation and stretching exercises as guided by your therapist.
Strengthening:

  1. Bodyweight Squat
  2. Pelvic Bridging
  3. Nordic Hamstring Exercise
  4. Windmill Lunges and Touches
  5. Forward T-Tips

Neuromuscular Control and Agility:

  1. Abdominal Planks
  2. Karaokes, Side Shuffling, Zig-Zag Shuffling
  3. A’s and B’s

Prevention:
General Guidelines:

  1. Adequate warm-up that incorporates dynamic stretching, gradual progression to sport specific movements, progressive running drills, balance and agility training.
  2. Maintaining good hamstring strength and flexibility
  3. Proper rehabilitation following initial injury

Include these exercises in your general strength training to minimize your risk of hamstring injury:

  1. Squats
  2. Pelvic Bridging
  3. Hamstring Eccentrics – Nordic Hamstring, Windmill Exercises
  4. Abdominal Planks

References:

  1. Heiderscheit, B. C., M. A. Sherry, A. Silder, E. S. Chumanov, and Darryl G. Thelen. “Hamstring Strain Injuries: Recommendations for Diagnosis, Rehabilitation, and Injury Prevention.” Journal of Orthopaedic and Sports Physical Therapy 40.2 (2010): 67-81. Print.
  1. Engebretsen, A. H., G. Myklebust, I. Holme, L. Engebretsen, and R. Bahr. “Intrinsic risk factors for hamstring injuries among male soccer players.” American Journal of Sports Medicine 20 (2010).
  1. Ekstrand, J., M. Hagglund, and M. Walden. “Epidemiology of muscle injuries in profressional football (soccer).” American Journal of Sports Medicine 20 (2011).
  1. Mtshali, P. TS, N. P. Mbambo-Kekana, A. V. Stewart, and E. Musenge. “Common lower extremity injuries in female high-school soccer players in Johnanesburg east district.” South African Journal of Sports Medicine 21 (2009).
  1. Brumitt, J. “Eccentric training to reduce hamstring injuries in sprinters.” NSCA’s Performance Training Journal 6: 8-10.